Do you need a warehouse in order to do the kind of volume it takes to make a full-time income from FBA? I’ve seen a few threads on social media and have had a few people ask me that exact question… and my answer to all of them is this: No, you do not need to rent or buy warehouse space in order to do the kind of volume needed to make a full-time income selling via Amazon FBA.
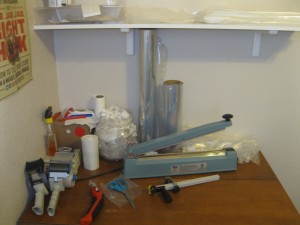
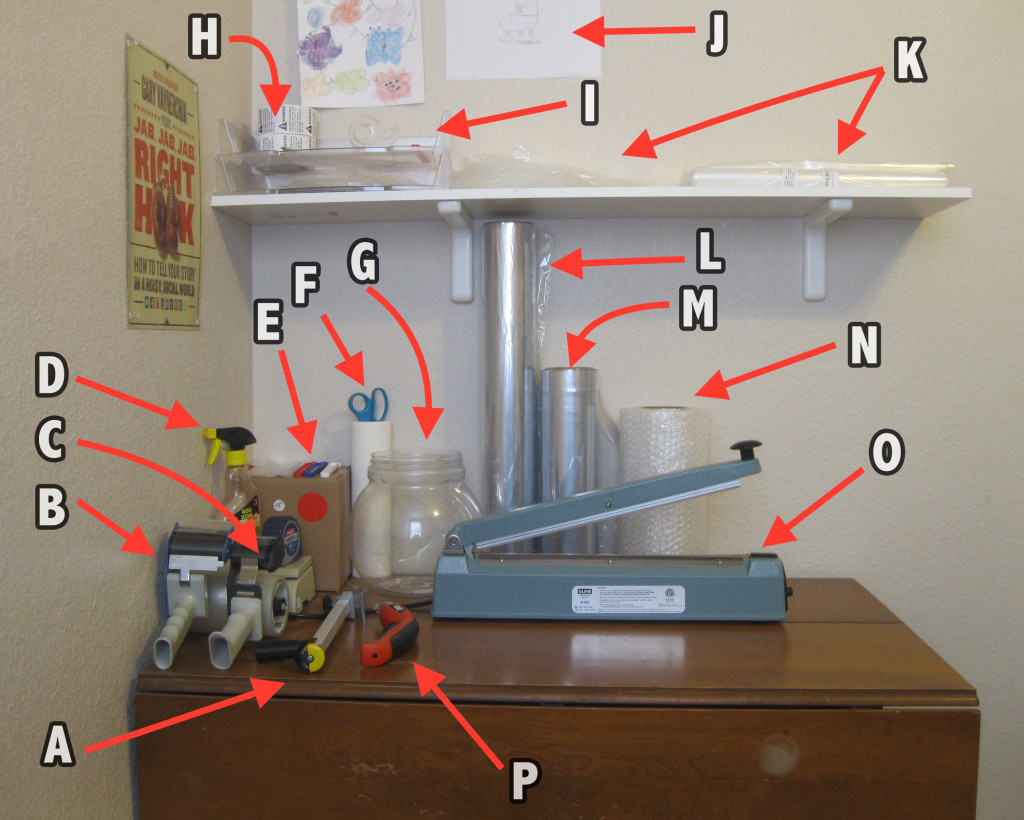
Today, I want to give you a peek inside my optimized full-time FBA work and shipping station. Is this work station in a warehouse? No, it’s in the corner of my office on an old dining room table. Here is a diagram of the work station we currently use. Below is a description of each and every item we use and why.
If you’re interested in learning more or want to add any these tools to your own FBA work station, click on the name of the tool below.
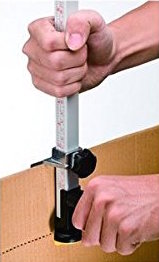 A. Cardboard Box Sizer and Reducer – This tool helps you reduce your shipping boxes to the exact size you need. Cutting your boxes down to size helps save you money in multiple ways: 1) Smaller boxes mean less shipping costs; 2) Smaller boxes mean you need less dunnage to fill boxes; 3) Less dunnage means that the box will weigh less, which saves you money over time. The tool is easy to handle, and I use it for almost every shipment. You can also use this box sizer to make some boxes bigger (yes, bigger!). For a quick video of the box sizer tool in action, check out our box sizer review post.
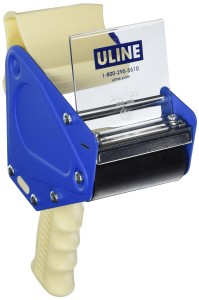 B. 3-Inch Tape Gun – This was seriously a game changer when it came to optimizing my packing and shipping experience. For years, I’d only used a 2-inch tape gun, but one day I realized I was using about three strips of tape each time I was securing the bottom and top of the box. I was using too much tape and wasting time as well. Now, I just use one strip of 3-inch tape to secure the base of the box and one strip of 3-inch tape to close the top of the box. It saves me both time and money.
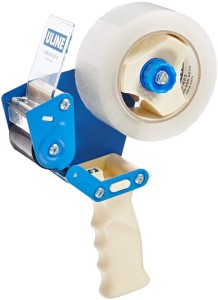 C. 2-Inch Tape Gun – While the 3-inch tape gun is perfect for securing shipping boxes, the 2-inch gun is better suited for smaller taping jobs. I use my 2-inch tape gun in multiple ways: 1) Secure bubble wrap when protecting a breakable item; 2) Tape over FNSKU labels that I worry might fall off of an item I’ve bubble wrapped; 3) Close up small holes in poly bags; 4) Secure smaller cardboard boxes that I use for bundles; 5) Tape over UPS labels that I worry might peel off in the heat of the summer, and so much more.
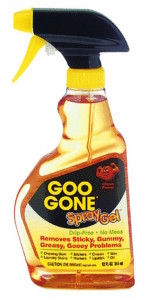 D. Goo Gone Spray Gel – Don’t you hate it when there is a price sticker on an item that just won’t come off cleanly? Goo Gone is the perfect solution to help get the sticky “goo” off your item. Simply spray some Goo Gone onto the sticky residue, and it will wipe off fairly easily. For really stubborn goo, use the Scotty Peeler in combination with the Goo-Gone to scrape away the excess goo. Note: There are many different products that you can use to remove the sticky adhesive left behind from a sticker. Some other alternatives are Un-Du and even lighter fluid.
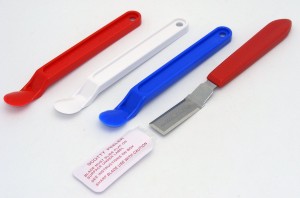 E. Scotty Peelers – One of the most annoying parts of retail arbitrage is taking off the price stickers of your latest inventory purchase. These tools are the perfect way to peel off the stickers from the item without damaging the original package. If any of the sticky residue remains on the item, simply use the Goo Gone and scrape off the goo with the Scotty Peeler. I sometimes even use a Scotty Peeler when doing retail arbitrage in case a store puts a price sticker over the UPC barcode. I’m just sure to put the sticker back on before purchasing the item or putting it back on the store shelf.
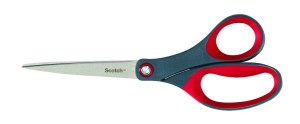 F. Scissors and Paper Towels – When you are cleaning sticker residue off of your inventory, you’ll need to use paper towels to help wipe up the mess. Plus, it’s just a good idea to have a roll of paper towels around. The scissors are used for multiple purposes, such as cutting poly bags, opening up boxes, cutting labels, and more. The paper towel roll also makes a perfect place to store your scissors while not in use.
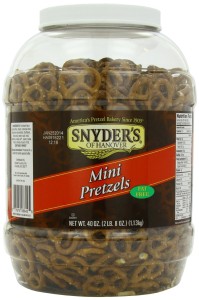 G. Excess Poly Bag & Trash Receptacle – Ok, so this isn’t some fancy trash can, but a re-purposed empty pretzel tub, but it really works well. Most normal trash cans are the same size from top to bottom, but this tub is more rounded at the top and bottom. This makes it much easier to put the excess poly bag waste and any other trash inside the tub without it expanding and coming out of the trash can. It might seem silly, but it really works out well for us (see the “after” picture at the bottom of the blog to see how well it works). Oh, and the pretzels are pretty darn good too.
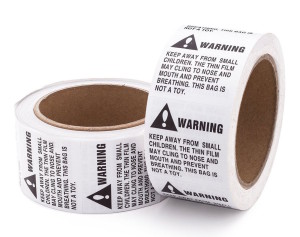 H. Suffocation Warning Labels – Each and every poly bag that you use on a product needs to have a suffocation warning label. Some poly bags come with warnings printed on them, but for the ones that don’t, it’s a good idea to have these stickers handy. If you use a poly bag and do not make sure there is a suffocation warning on the bag, then you will be in violation of Amazon guidelines. These labels are easy to use and stay on well too.
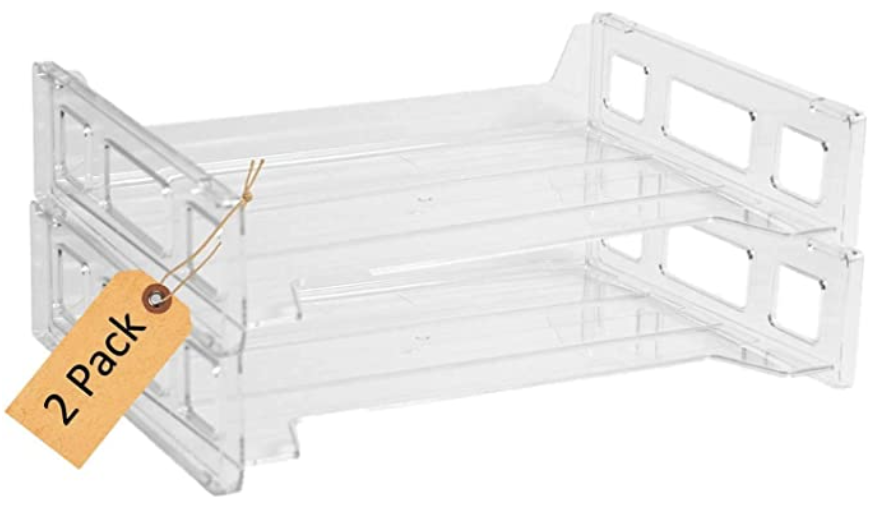 I. Stacking Letter Trays – These trays are where I store such supplies as my suffocation warning labels, expiration date labels, clear tape, pens, and more.
J. Inspiration – Everybody needs some inspiration now and then, and one of the things that inspires me the most are my kids, nieces, and nephews. I love to hang their art up in my office to be reminded that there is so much more to life than work. It motivates me to use my work time more efficiently so that I can spend more time with them.
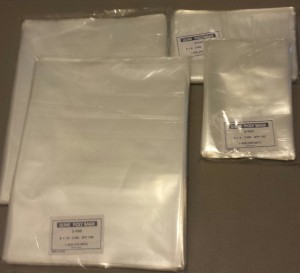 K. Poly Bags – According to Amazon guidelines, there are many items that need to be poly bagged if you plan on sending them to a FBA warehouse. These bags protect your inventory from the dirt and dust found in a FBA warehouse. Poly bags come in various sizes and thickness. Be sure you know what minimum requirements Amazon has for poly bags. The ones pictured are some of my favorite to order.
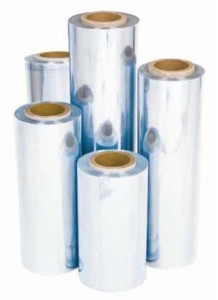 L. 24-inch Centerfold Shrink Wrap Film – This is the shrink wrap film that I use for shrink-wrapping larger items like long board games, big puzzles, longer toys, and anything else longer than 14 inches.
M. 14-inch Centerfold Shrink Wrap Film – This is the shrink film that I use for almost all other items I need to shrink wrap. It pairs well with my 16-inch impulse sealer (see below).
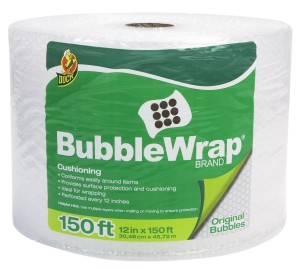 N. Bubble Wrap – If you are selling anything made of glass or any other fragile item, you’ll want to protect it with quality bubble wrap. This bubble wrap is perforated every 12 inches so you can easily tear off only the amount of bubble wrap you need. It’s perfect for picking the right amount of bubble wrap to use each time. For a more local option, both Walmart and Sam’s Club have a big roll of bubble wrap (12 in x 150 feet) at an affordable price.
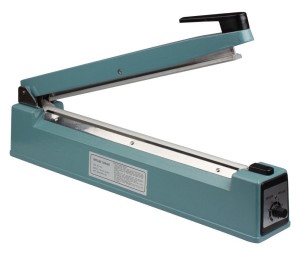 O. 16-inch Impulse Sealer – People always ask me what size impulse sealer they should get. Without any hesitation I tell them the 16-inch model. The first impulse sealer I purchased was a 14-inch model, and there were so many times I wished it had a longer reach for sealing. You might think that the extra 2 inches isn’t that big of a deal, but it really is. I could have ordered the 20 inch impulse sealer, but have found that I almost never need more than my 16 inch sealer. Here is a video of me using this impulse sealer while processing my inventory.
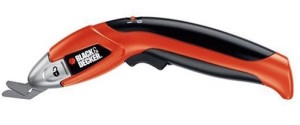 P. Black & Decker Power Scissors – Ok, so many of you would probably be happy with an average utility knife, but these scissors are simply amazing. They make sizing down a box or creating a custom-sized box very easy. I use these almost every day that I’m packing and shipping. It saves tons of time and energy, and I simply won’t do without it. If the cost of a new one scares you, get a used one. That’s what I did and it has worked great for me.
Not Pictured:
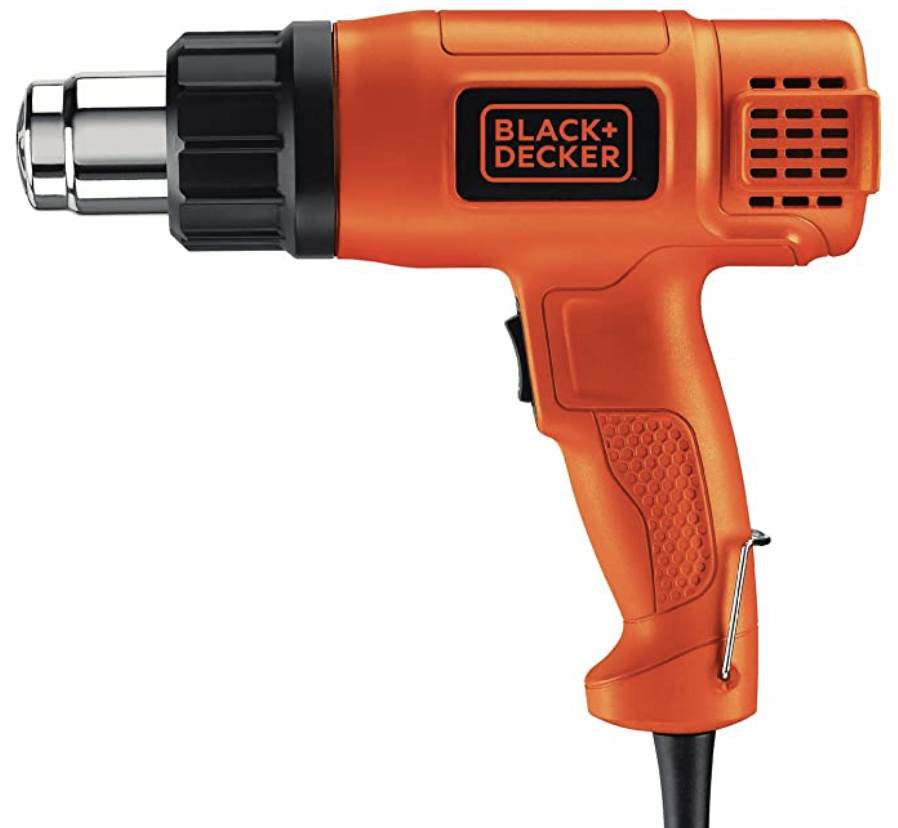 Q. 1300 Watt Heat Gun – I use this heat gun in two ways: 1) To heat up the shrink-wrap so that it properly seals around the item I’m wanting to wrap for a very professional sealed look; 2) To heat up price stickers so they can be removed easier. When you apply heat to a price sticker or label and use a Scotty peeler, the label comes off very easily. Want to see this heat gun in action? Here is a video of me using the heat gun to shrink wrap an item, and here is a video of me using the heat gun to remove price stickers. This heat gun comes with 2 temperature settings and includes a built-in stand for easy (and safe) cool down.
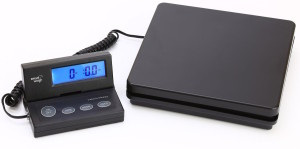 R. Shipping Scale – This scale looks small (because it is – 8″ x 8″ x 1″) but it will weigh boxes up to 100lbs with accuracy. The weight is shown on an LCD display connected to the scale with an extendable cord. This means you can put a big, heavy box on the scale, but still see how much it weighs on the separate display. When shipping your items, you want to be sure your scale is accurate. An inaccurate scale could
  cost you hundreds of dollars a year.
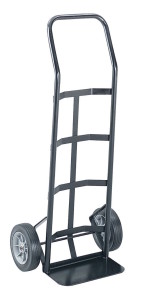
S. Hand Truck (Dolly) – When it’s time to take all of the boxes to UPS, I load them all up on this very sturdy hand truck and roll them out the front door. I can easily get three 18x18x16 boxes stacked on this dolly for easy transport.
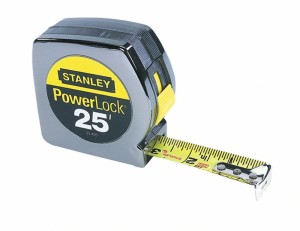 U. Measuring Tape – When you reuse boxes or even create your own box sizes, you really need to know the exact dimensions to tell Amazon so you can be charged the right amount for shipping. Not entering in the correct shipping dimensions could ding your Amazon seller account metrics. There are many other ways to use this in your FBA business, like if you are creating a new product page and need the exact dimensions of the product.
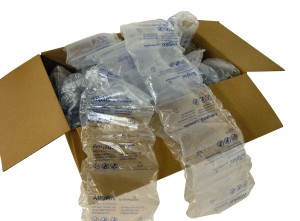 V. Dunnage (Void Fill) – Not every box will be filled to the top with items, so you need to be sure there are void fillers placed in the box. My favorite dunnage are air pillows. When Amazon sends me a large box and includes air pillows inside, I always save them to use in my own shipments to FBA. When I run out of air pillows, I usually use newspaper tied up in a plastic grocery bag. It is against Amazon guidelines to use newspaper as void fill because they don’t want the newsprint to get on the items, but it is ok if you bag the newspaper and use that instead. Of course, air is lighter than paper and is my preferred method. Maybe one day I might even splurge for an air pillow machine.
Other than shipping boxes, which I usually get at Lowes, Home Depot, and Walmart, the above items are everything I use when I’m prepping, packing, boxing, and shipping. These are the tools I use almost every day in order to run my full-time FBA business.
TIP: Bookmark this page so when you are ready to add something new to your work station, you have a handy list of what you want to add.
Whenever my wife and I come in from a huge retail arbitrage haul (sometimes hundreds of items in one day) we bring the items into the house, remove the price stickers (usually in front of the TV or while listening to an audiobook), poly bag any item that needs it, and then place all the items on the floor near the desk to be inventoried and processed on the laptop. Once the items have been processed, we raise the drop leaf on the table so there’s space to box up everything. Add the shipping labels, and we’re ready to send our inventory off to Amazon. No warehouse required.
Note: Next week, I’ll share with you all of the tools I use at my desk when I’m processing my inventory to send to Amazon.
Now I want to hear from you. What tools are your favorite? How do you make the most of the space at your house for doing your FBA business? I’d love to see what you use, so comment below!
*This post was updated for 2021
Great list, Stephen! We have a very similar line up with the tools we use, but my absolute favorite I don’t see listed…. a UPC Scanner. I can do without some of the other tools, but a UPC Scanner saves for time than any other individual item.
Yes, Chad, I love my UPC scanner! In fact, my next blog post is going to be about my desk & processing set up… so be looking for that in your inbox sometime soon.
Great post, Stephen! I also use a sharpie (to number boxes) and a pen and notepad to keep track of the box number, weight, and dimensions since I use the Scan & Ship method. That way I can totally pack and tape them up, put them away, and put the shipping labels on the right box when I finish the shipment.
For those of you using Scan & Ship, that is a great way to keep your products and shipment boxes organized. Good for you!
Stickers are the bane of my existence. I sell 100+ books a week, most of which have one of the worst price stickers I have ever encountered on the binding. I have tried everything.
the best results I have found are these:
1. Give up! That’s right, I finally realized that for books which are not going to be conditioned above “Good”, there is no reason to waste my time. So to obscure the price (to avoid angry customers), first I used small stickers (fighting stickers with stickers!) but couldnt find one that worked well. Then I switched to a King sized Sharpie marker, which looks awful. Now I have settled with using little disposable sponge/paint brush things that I wipe goo gone over the sticker with. The writing on the sticker comes off instantly and I am lest with a white sticker. This has saved me a ton of time, as at least half my books I grade as “good”.
For the ones where I truly must remove the evil sticker, I went from the classic slow peel then goo gone/wipe method, then I switched to gum erasers (which work great on sticky residue on a solid surface), to electric erasers. The Sakura model is the best. It is made for artists but works great for removing residue quick. I use a single 3.7V AAA size lithium battery in it with a dummy battery so I can get extra power and can recharge. Combined with slow peeling and gum erasers, this is the way to go for destroying “evil” level stickers on books. Also, as a benefit, children can do it!
I havent gotten up the courage to leave the price visible, I just think customers would leave bad feedback if they pay $40 for a book with a $1 sticker on it.
The only think I dont see in your list is dunnage. I use paper grocery bags. Also I find a measuring tape, knife, and an assortment of markers useful.
great post Stephen.
David! Great description on your evolution in dealing with stickers on books. I’ve totally been there! And yes, I need to add to the post about the dunnage and measuring tape I use. Thanks for the reminders and the additions.
Thanks Stephen,
I enjoy getting these blogs. I have been selling for two weeks. Yep for now there are boxes in my small living room. I will take some of your great ideas. I do have some of those supplies. Thanks again.
Really glad the blog posts are helpful to you. I know you’ll find the best system for your own situation in how to process your inventory. Mine has been an evolution and just keeps getting better… I know yours will too.
A couple more things I thought of.
First, I rarely do poly bags, so I made a template in my Dymo printer to just print off the occasional suffocation warning. I also do that for “sold as set” stickers.
Also, there are foldable hand trucks that may be a bit more convenient than the one you pictured. Mine folds down quite small and easily fits in the corner of my trunk.
On the subject of shipping though, I also have started having UPS pick up my stuff at my house. It is surprisingly cheap, and you can even get a free year of that service. I will pay for it when my year is up though. Especially for heavy book boxes.
David,
More great additions! Yes, I used to make my own suffocation warning labels with my Demo printer, but I also know those labels are not cheap. I also make “sold as set – do not separate” stickers with my Dymo. I’ll blog more soon about my processing desk very soon. Thanks again for your additional thoughts.
I love my electric decal remover. It’s a razor blade that is heated and is great for removing price stickers. It often takes much of the residue also, although I still need Goo Gone to make sure it’s all gone. Of course, you have to be careful when using it on plastic shells, because it is hot. You have to be quick when using it on plastic. But it’s definitely faster than just the Scotty peelers (which I have and love), and it’s great for books and boxes.
I also have a tape dispenser for 2 in tape, which is great when you need tape and only have one free hand. Dispensers that hold rolls of stickers (such as the suffocation warning stickers) are also convenient.
Sharpies are also a great way to freshen up the corners of boxes that are showing a bit of shelf wear (assuming the box is black, of course).
Jennie,
I’ve heard of the electric decal removers but have not used one yet. I heard that it was possible to really damage a book (or any other product) that way and that you really need to be careful. Have you found that to be the case?
The only time I have damaged an item was a price sticker on a plastic “window” in the front of the box. I melted the plastic. It was a combination of going to slow (end of day tiredness) and the fact that the blade had dulled with use.
In using the electric decal remover, keeping a sharp blade and moving quickly are probably the key tips to avoiding damage. Fortunately, the blades are just regular razor blades and are inexpensive. But I’ve never had problems using it on books – either the cover or the first page. But I sell mostly toys and books are not my focus.
Good to know! Thank you.
Here is an old Antiquarian booksellers tip. Use lighter fluid on all stickers and grease pens whether they are on paper (pages) or the dustjacket (coated or uncoated). The reason is, it is highly volatile and dries superfast while leaving no trace residue. Oil based fluids can stain paper that is not coated.
Really good tip, Keith! Thank you.
Wonderful list! The only other thing I would add is 3″ round Avery labels. They cover up boo-boo’s on a package but just look like it is part of the box. I use silver but they come in white or gold too.
Great addition, Stacey! I use a few different round stickers to cover up “boo-boo’s” or other things (like prices printed on the package). I use these gold stickers, and these small hologram stickers too.
Stephen,
I’m a pretty new seller and am a little confused on why and how you use shrink wrap. I’m guessing you use it for items that you don’t have poly bags for, but I was a little confused why you would shrink wrap board games (are they used board games)? So, instead of using the plastic that you can get on a roll and make your own sized bags with a sealer, you use shrink wrap? And shrink wrap does not require using a sealer, correct? I’ve never used shrink wrap before so I know that’s probably a dumb question!
Thanks for your help!
I use Shrink Wrap in combination with the Impulse Sealer and the Heat Gun. I put the items in the shrink wrap, close the bag with the impulse sealer, and shrink the plastic with the heat gun.
Here are all the ways (that I can think of right now) that I use the shrink wrap for:
1. Used (collectible) board games – so the pieces stay inside and the box doesn’t come open.
2. DVD boxed sets – again, so the DVDs stay safely inside the box and do not fall out and get lost.
3. High priced books – A little added protection since how I know rough FBA warehouses treat books.
4. Used DVDs where the case doesn’t close well.
5. High priced DVDs – for the same reason I wrap high priced books.
6. Health & beauty items – so they don’t accidentally leak onto other items during shipment or FBA storage.
7. Grocery items – same reason I wrap health and beauty items.
8. Multi-packs – Sometimes shrink-wrapping is a better idea than poly bagging on some multi-packs.
9. Used (collectible) puzzle boxes – Like board games, I don’t want any of the pieces inside the box to fall out or get lost.
10. High priced video games – So the game doesn’t fall out and get lost.
Those are just ten of the top of my head. I’m sure there are more, but I think you get the idea.
Home depot has blank newsprint pretty cheap as well, and of course some of the cheapest boxes around.
Good tip on the newsprint… and yes, Home Depot boxes are one of my favorite to use for shipping.
I hate packing boxes so I don’t want to mess with the box resizer. I pay extra for smaller boxes so I don’t have to deal with it. At least I get a discount if I buy 10 or more, and a deeper discount if I buy 50 at once. More than 50, I can’t fit it my car…lol. Also, the boxes from Lowes always seem to have a ½” gap where the bottom flaps meet and Walmart boxes come folded over instead of laying flat. I don’t like getting dirty newspaper print on my hands so I don’t deal with that either. I buy blank newsprint or use wrapping paper when I can get it for 25 cents or less after Xmas.
Instead of Scotty Peelers, I have a little scratcher thing used for scratching off lottery tickets. For the measuring tape, I use a retractable sewing tape (much lighter than the one pictured).
I like your idea for the poly bag & trash receptacle. Gonna try that!
Two things I use regularly that haven’t been mentioned are a hole puncher and paper trimmer. The hole puncher I use to put a couple of venting holes in the poly bags so that air doesn’t get trapped inside…makes it easier to seal. The paper trimmer I use to cut down my shipping labels (when they’re wider than the box flap) or to cut cover-up labels (for hiding bar codes). I know I can use scissors but it looks neater this way.
Thanks for the additional ideas, Phebe!
Hi! Great info! Love all the comments!
On the subject of stickers, try using your hair dryer to quickly heat the sticker; Peals off while warm with little residue. A makeup pad with a few drops of vegetable oil will lift sticker goo nicely,too. Cheers!
Yes, I use a heat gun and scotty peeler to take off the price stickers… it works great. I mainly use the “thank you” or hologram stickers if there is a very small defect on the item’s packaging. Really helps make the item look better and still in “new” condition.
I have a question about the poly bag requirements. There still are none where indicated in your helpful set-up of a shipping station. In order to locate them elsewhere and to make sure they fit the Amazon requirements, I found the sizes but it says nothing of the Mil minimum needed. Can you shed some light on this?
Here is the link in the Amazon guidelines that states that a poly-bag must be at least 1.5 mil.
http://www.amazon.com/gp/help/customer/display.html/?nodeId=200243250#poly
Your shipping station looks great! Thanks for sharing all your must-have supplies. it’s awesome when you can re-purpose items in your house – like an old dining room table!
Stephen, just wanted you to know I think you are the kindest FBA encourager on the internet. You exude compassion and inspiration.
Wow. Thank you so much for your kind words. It means a lot to me.
You are welcome, sir. Your posts are always helpful and practical and easy to follow.
I am wondering if we can just use say a 18″ roll of shrink wrap for most applications?
I am in Canada and Amazon.ca doesn’t have/or won’t let me ship some of the items listed in this post. Maybe if you could gather a list catered to Amazon.ca that would be great.
Hi, I’m just starting out. What do you use for your bar code labels and shipping labels? Do they have to be printed on a laser or thermal printer, or will a regular inkjet printer work?
Thanks!
That info can be found here: https://www.fulltimefba.com/fba-desk
Thank you Stephen for this post. I do all my own prep in my place and I was surprised to see you did too! I have been on the fence about using a prep centre to scale but the added costs, the extra time getting things to Amazon, and not having control over what is acceptable to send in if things arrive damaged, etc. makes me step back. Plus, I do a lot of RA too so I have to prep myself. Anyway, I am inspired to see that you do it old school even though you are big time successful sellers! You and Rebecca are so generous with your knowledge and experience – thank you!
Lisa, we actually do both!! We have a prep center we send our OA and wholesale inventory to… and our RA we either prep ourselves or drop it off at a prep center… but definitely still prep our inventory ourselves when it’s the best option. We prepped ourselves and still made a full-time income with Amazon, so it’s totally possible. However, outsourcing to a prep center did free up a TON of time to focus on more sourcing (and this blog too). Do a quick search for “prep center” on this blog for a few posts about that topic.